Mould is one of the most common and persistent problems facing Auckland homeowners. Our subtropical climate — warm, humid, and frequently wet — creates the perfect breeding ground for mould species that thrive on moisture and organic materials. Left unchecked, mould does not just look unsightly; it can cause serious health problems and significant damage to your property.
Whether you have spotted suspicious dark patches in your bathroom, noticed a musty smell in your wardrobe, or are dealing with a persistent mould problem that keeps returning despite your best efforts, this guide will help you understand what you are dealing with and what to do about it.
Why Auckland Is a Mould Hotspot
Auckland's climate is one of the primary reasons mould is so prevalent in the region. Several factors combine to create conditions that mould absolutely thrives in.
High Humidity Year-Round
Auckland's average relative humidity sits between 70% and 85% for much of the year. Mould begins to grow actively when indoor humidity exceeds 60%, which means Auckland homes are at risk virtually all year round. The summer months bring warm, muggy conditions, while winter introduces cold surfaces that cause condensation — both scenarios feed mould growth.
Frequent Rainfall
Auckland receives approximately 1,200mm of rainfall annually, spread across around 135 rain days per year. This constant moisture load challenges even well-maintained properties. Roof leaks, blocked gutters, and poor drainage around foundations are common moisture entry points that many Auckland homeowners are not aware of until mould appears.
Older Housing Stock
A significant proportion of Auckland's housing was built before modern building standards required adequate insulation, vapour barriers, and mechanical ventilation. Homes built in the 1950s through to the 1990s are particularly susceptible due to:
- Single-glazed windows that create cold surfaces where condensation forms
- Minimal or no wall insulation, leading to cold interior wall surfaces
- Lack of mechanical ventilation in bathrooms, kitchens, and laundries
- Subfloor ventilation issues, particularly in homes built on piles with enclosed perimeters
- Weatherboard cladding that can deteriorate and allow moisture ingress over time
Auckland fact: Research from BRANZ (Building Research Association of New Zealand) has found that nearly half of New Zealand homes show signs of mould, with Auckland properties among the most affected due to the region's climate and housing characteristics.
Types of Mould Found in Auckland Homes
Not all mould is the same. Understanding the common species found in New Zealand homes helps you assess the severity of your problem.
Black Mould (Stachybotrys chartarum)
This is the mould that causes the most concern, and for good reason. Black mould appears as dark greenish-black patches with a slimy or wet texture. It thrives on materials with high cellulose content — GIB board (plasterboard), timber framing, carpet, and wallpaper. Black mould produces mycotoxins that can cause serious respiratory illness and typically indicates prolonged, significant moisture exposure.
Aspergillus
One of the most common indoor moulds in New Zealand, aspergillus can appear in various colours including green, yellow, white, and black. It frequently grows on food, in air conditioning systems, and on damp building materials. While many aspergillus species are relatively harmless, some can cause aspergillosis — a potentially serious lung infection — particularly in people with weakened immune systems.
Cladosporium
Cladosporium typically appears as olive-green to brown or black spots. It is commonly found on fabrics, carpet, wood surfaces, and inside HVAC ductwork. It is one of the first moulds to colonise damp surfaces and is a major trigger for hay fever and asthma symptoms. Unlike many moulds, cladosporium can grow at cooler temperatures, making it a year-round problem in Auckland.
Penicillium
Recognisable by its blue-green fuzzy appearance, penicillium is commonly found on water-damaged building materials, wallpaper, carpet, and insulation. It spreads rapidly and produces large quantities of airborne spores. It is a significant cause of allergic reactions and can contribute to chronic sinusitis and respiratory inflammation.
Alternaria
This mould is commonly found in damp areas like bathrooms, showers, and around leaking windows. It appears as dark brown or olive-green velvety patches. Alternaria is one of the most potent allergenic moulds and is a major trigger for asthma attacks, particularly in children.
Health Effects of Mould Exposure
Mould exposure is not something to take lightly. The health impacts range from mild irritation to serious chronic conditions, depending on the species, concentration, duration of exposure, and individual vulnerability.
Common Symptoms
- Respiratory issues — persistent coughing, wheezing, shortness of breath, and a tight chest
- Nasal and sinus problems — chronic congestion, runny nose, sinus headaches, and frequent sneezing
- Eye irritation — red, watery, itchy eyes, particularly upon waking
- Skin reactions — rashes, itching, and dermatitis in sensitive individuals
- Fatigue and headaches — often overlooked but commonly linked to mould exposure
- Sore throat — persistent throat irritation that does not respond to typical treatments
Who Is Most at Risk?
- Children and infants — developing immune and respiratory systems are more vulnerable
- Elderly people — may have reduced immune function and pre-existing respiratory conditions
- Asthma sufferers — mould is a well-documented asthma trigger
- People with allergies — mould spores are a potent allergen
- Immunocompromised individuals — those undergoing chemotherapy, organ transplant recipients, or HIV-positive individuals
Health note: If occupants are experiencing persistent respiratory symptoms, headaches, or allergic reactions that improve when they leave the home and return when they come back, mould contamination should be investigated as a likely cause.
How to Identify Mould in Your Home
Mould is not always visible. It can grow hidden behind walls, under flooring, inside ceiling spaces, and within HVAC systems. Here is how to detect mould problems in your Auckland home.
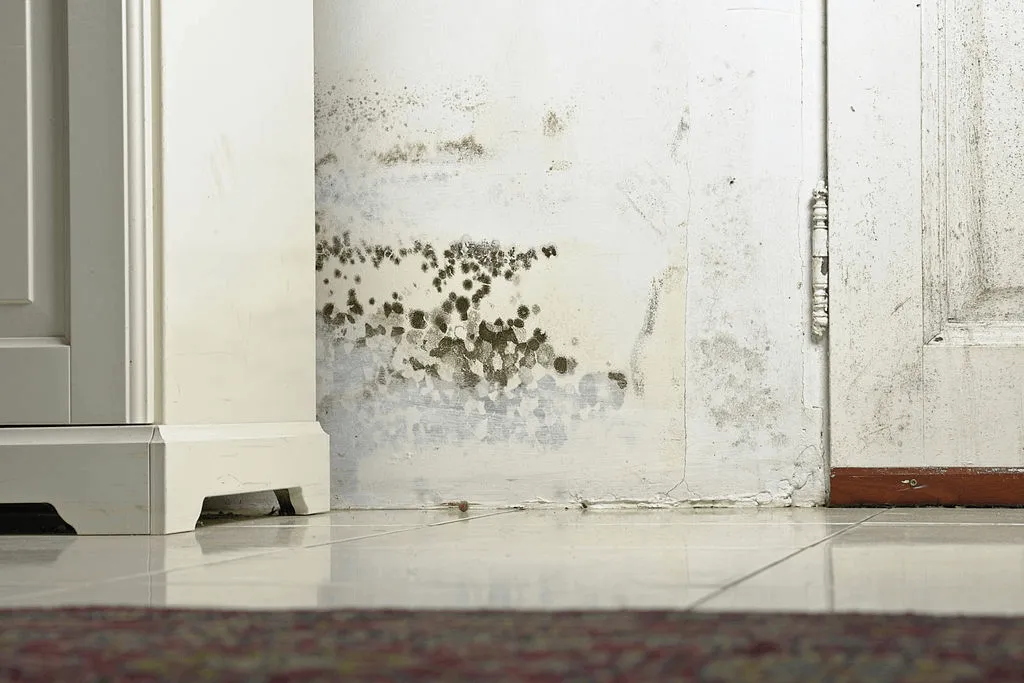
Visible Signs
- Discolouration on walls and ceilings — look for dark spots, streaks, or patches in corners, behind furniture, and around windows
- Peeling or bubbling paint — moisture behind painted surfaces causes paint to lift, often with mould growing beneath
- Staining on walls and ceiling tiles — brown or yellow water stains often indicate a moisture source that could harbour hidden mould
- Fuzzy or powdery growth — particularly in bathrooms, on grout lines, around shower recesses, and under sinks
- Warped or swollen timber — skirting boards, door frames, and window sills that have swollen or warped indicate moisture absorption
Smell
Mould produces a distinctive musty, earthy odour caused by microbial volatile organic compounds (MVOCs). If you can smell this musty scent — particularly in enclosed spaces like wardrobes, cupboards, or rooms that have been closed up — there is likely mould growing somewhere nearby, even if you cannot see it.
Health Symptoms as Indicators
Sometimes the first sign of a mould problem is its effect on the occupants. If family members are experiencing unexplained allergic symptoms, worsening asthma, chronic sinus infections, or persistent cold-like symptoms that do not resolve, consider having your home professionally assessed for mould contamination.
Using a Moisture Metre
Affordable pin-type moisture metres (available from hardware stores) can help identify damp areas in walls, floors, and timber. Readings above 18% moisture content in timber indicate conditions favourable for mould growth. Professional inspectors use more sophisticated equipment including thermal imaging cameras that can detect hidden moisture patterns through walls.
DIY Mould Removal: When It Is Appropriate
Minor surface mould on non-porous surfaces can often be safely cleaned by homeowners. Here are the guidelines for safe DIY mould removal.
When DIY Is Appropriate
- The affected area is less than 1 square metre
- Mould is on non-porous surfaces (tiles, glass, sealed bench tops, vinyl)
- The moisture source has been identified and fixed (e.g., a leaking tap has been repaired)
- No occupants are experiencing health symptoms
- Mould is not inside wall cavities, ceiling spaces, or the HVAC system
How to Clean Surface Mould Safely
- Wear protective gear — P2/N95 mask, safety goggles, and rubber gloves at minimum
- Ventilate the area — open windows and doors to provide fresh air circulation
- Prepare a cleaning solution — white vinegar (undiluted) is effective for most surface mould. Alternatively, use a commercial mould-killing product from your local hardware store
- Apply and scrub — spray the solution generously, leave for 10 to 15 minutes, then scrub with a stiff brush
- Rinse and dry — wipe the area clean and ensure it dries thoroughly
- Dispose of materials — bag and dispose of any cloths, sponges, or brushes used in cleaning
Important: Avoid using bleach on porous surfaces. While bleach kills surface mould, it does not penetrate into porous materials like timber or GIB board, and the water content in bleach can actually feed mould growth deeper within the material.
When to Call Professional Mould Remediation
Professional mould remediation is strongly recommended in the following situations:
- The affected area is larger than 1 square metre
- Mould is growing on porous materials (GIB board, timber framing, carpet, insulation)
- Mould is inside wall cavities, ceiling spaces, or subfloor areas
- The mould keeps returning after cleaning
- There has been flooding or significant water damage (learn more about flood restoration)
- Occupants are experiencing health symptoms
- You suspect black mould (Stachybotrys) is present
- The property is a rental and must comply with Healthy Homes Standards
The Professional Mould Remediation Process
Professional mould remediation is a systematic process that goes far beyond surface cleaning. Here is what to expect when you engage a professional team like iDry Restorations.
Step 1: Comprehensive Assessment
A qualified technician inspects the property using visual assessment, moisture metres, thermal imaging, and sometimes air quality sampling. This identifies the full extent of the mould contamination, including hidden mould, and determines the moisture source that is feeding the growth.
Step 2: Containment
To prevent mould spores from spreading to unaffected areas during remediation, the contaminated zone is sealed off using polyethylene sheeting and negative air pressure machines with HEPA filtration. This containment is critical — disturbing mould without proper containment can spread millions of spores throughout the property.
Step 3: Air Filtration
Industrial HEPA air scrubbers are set up to continuously filter airborne mould spores, both within the containment zone and in adjacent areas. These machines capture particles down to 0.3 microns, which is small enough to trap mould spores (typically 1 to 100 microns).
Step 4: Mould Removal
Depending on the materials affected, the remediation team will either clean or remove contaminated materials:
- Non-porous surfaces (tiles, metal, glass) are cleaned with commercial antimicrobial solutions
- Semi-porous surfaces (timber) may be sanded, cleaned, and treated with antimicrobial coatings
- Porous materials (GIB board, carpet, insulation) that are heavily contaminated are removed and replaced
Step 5: Moisture Source Remediation
Removing mould without addressing its moisture source guarantees it will return. The remediation plan includes identifying and resolving the underlying moisture issue, whether that is a roof leak, plumbing fault, inadequate ventilation, rising damp, or condensation management.
Step 6: Drying and Dehumidification
Commercial dehumidifiers and air movers are used to reduce the moisture content of all building materials to safe levels (below 15% for timber). This stage is monitored with daily moisture readings until the target is achieved.
Step 7: Verification and Clearance
Post-remediation verification may include air quality testing to confirm that mould spore levels have returned to normal background levels. A detailed report is provided documenting the work completed, materials removed, and clearance results.
Preventing Mould in Auckland Homes
Prevention is the most effective and affordable strategy for managing mould in Auckland. These practical steps are specifically tailored to Auckland's climate conditions.
Ventilation
- Use extractor fans in bathrooms, kitchens, and laundries. Run them during and for at least 20 minutes after showers, cooking, or clothes drying
- Open windows daily for cross-ventilation, even in winter. Even 15 to 20 minutes of fresh air exchange makes a significant difference
- Consider a home ventilation system such as a positive pressure or balanced pressure system, which continuously introduces filtered, dry air into the home
- Do not block existing vents — subfloor vents and passive wall vents are there for a reason
Moisture Control
- Dry laundry outdoors whenever possible. If using an indoor clothes dryer, ensure it is vented to the outside, not into the house
- Use a dehumidifier in persistently damp rooms. Aim to maintain indoor humidity below 60%. A hygrometer (humidity gauge) from a hardware store costs around $15 to $20 and helps you monitor levels
- Fix leaks promptly — a dripping tap, leaking shower, or minor roof leak can produce enough moisture to sustain a significant mould colony
- Maintain gutters and downpipes — ensure rainwater is directed well away from the foundation. Auckland's heavy rainfall events can overwhelm clogged guttering
- Address condensation — wipe down windows and sills that develop condensation. Consider upgrading to double-glazed windows, which dramatically reduce condensation
Insulation and Heating
- Insulate your home — ceiling and underfloor insulation reduces cold surfaces where condensation forms. This is now mandatory in rental properties under the Healthy Homes Standards
- Heat your home adequately — maintaining indoor temperatures above 18 degrees Celsius reduces the risk of condensation on cold surfaces. The Healthy Homes Standards require landlords to provide a fixed heater in the main living area
- Avoid unflued gas heaters — these release large amounts of moisture into the air (up to 1 litre of water per hour), dramatically increasing humidity levels and mould risk
Auckland tip: During winter, Auckland homes can produce 8 to 10 litres of moisture per day through normal activities like cooking, showering, and breathing. Without adequate ventilation, this moisture has nowhere to go and condenses on the coldest surfaces in your home — which is exactly where mould starts growing.
Tenancy Act Requirements for Landlords
If you are a landlord or property manager in Auckland, you have specific legal obligations regarding mould and moisture in your rental property.
Healthy Homes Standards
Under the Residential Tenancies (Healthy Homes Standards) Regulations 2019, all rental properties must comply with minimum standards in five areas, several of which directly relate to mould prevention:
- Heating — a fixed heater must be provided in the main living area, capable of heating the room to at least 18 degrees Celsius
- Insulation — ceiling and underfloor insulation must meet minimum R-values specified for the Auckland climate zone
- Ventilation — openable windows in all habitable rooms, plus extractor fans in kitchens and bathrooms that vent to the outside
- Moisture ingress and drainage — the property must have efficient drainage and guttering, no leaks, and a ground moisture barrier where applicable
- Draught stopping — unreasonable gaps and holes in walls, ceilings, windows, floors, and doors must be blocked
Landlord Responsibilities
Landlords are required to maintain the property in a reasonable state of repair. If mould is caused by structural issues, inadequate ventilation infrastructure, moisture ingress through the building envelope, or non-compliance with Healthy Homes Standards, the landlord is responsible for remediation.
Tenant Responsibilities
Tenants have a responsibility to use the ventilation and heating systems provided, keep the property reasonably clean, and report any leaks or maintenance issues promptly. Mould caused purely by tenant lifestyle choices (for example, blocking vents, refusing to use provided ventilation, or creating excessive moisture without ventilating) may be the tenant's responsibility.
When Mould Follows Flooding
Auckland has experienced several significant flooding events in recent years, and mould growth after flooding is almost inevitable without professional intervention. If your property has been affected by flooding:
- Mould can begin growing within 24 to 48 hours of water exposure
- Flood water carries bacteria, sediment, and contaminants that accelerate mould colonisation
- Materials that remain damp for more than 48 hours will almost certainly develop mould, even if they appear dry on the surface
- Professional flood restoration includes mould prevention as a standard part of the drying and remediation process
If your Auckland home is affected by mould — whether from flooding, a persistent leak, or simply the challenges of living in a humid climate — do not ignore it. Early intervention prevents the problem from escalating and protects your family's health.
In some cases, mould problems may be compounded by other contamination issues. If you suspect your property may also have meth contamination, iDry can provide decontamination as part of a comprehensive property remediation plan. We also offer fire damage restoration Auckland services, as smoke and water damage from firefighting frequently leads to mould growth. For properties affected by sewage backflows or other hazardous materials alongside mould, our biohazard cleaning service ensures complete decontamination.
Contact iDry Restorations for a professional mould assessment. Our IICRC-certified team provides comprehensive mould remediation services across all Auckland suburbs, from Devonport to Manurewa, Henderson to Howick.